Visar inlägg med etikett 15mm Terrain. Visa alla inlägg

måndag 14 september 2015

Dusty old roads

Made a bunch of 15mm roads, mainly to be used for WWII but will also work for my Neo Soviets slugging it out on Ukrania XIIV. The plan is to get a Chain of Command 15mm Barbarossa campaign  rolling...


lördag 27 juni 2015

Oil rigs and tanks

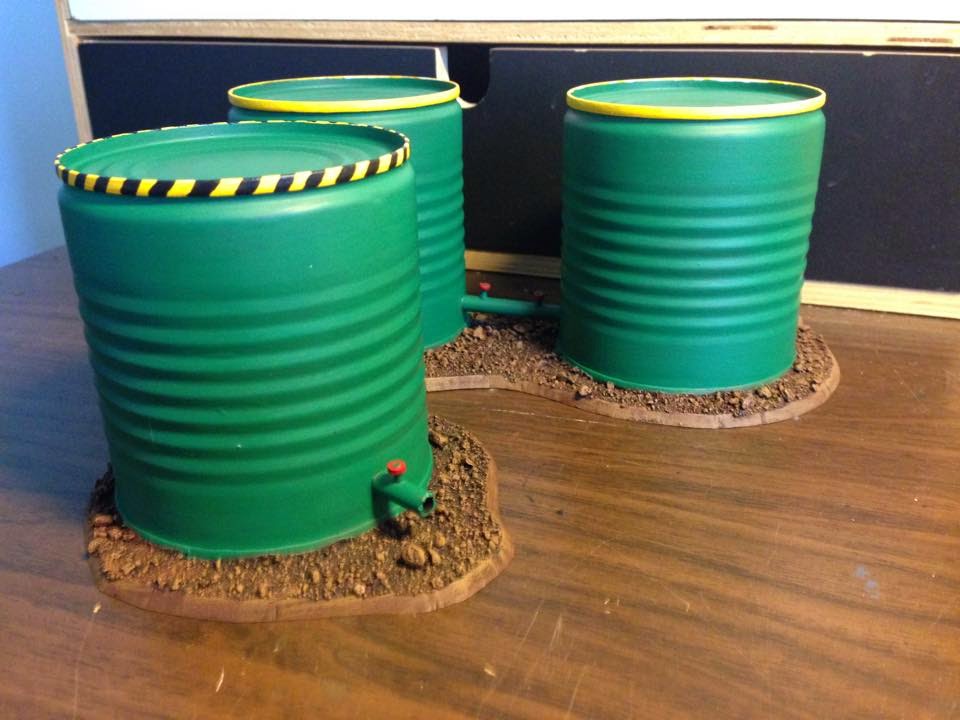
More cheap scratch built terrain, the rigs are made using plastic card and a rod. The tanks are corn cans turned up side down.


Wind generator

Finished the generator for my Shanty Town, already a classic sniper hideout! 


More painted Mad Mecha Guy


Here are some of stuff I got from MadMechaGuy. Im really satisfied with it all, both from a price perspective and with how they turned out as well. The posters were just printed and glued on using PVA before weathering.


fredag 12 juni 2015

MadMechaGuy containers

MadMechGuys containers, what can I say? Cheap, fast to paint, looks great, simply wonderful. Added some random transfers and weathering for a more "realistic" look.


The main reason why stuff go missing...


torsdag 4 juni 2015

Back on track

Life happened, what else can you say...

Here are the first attempts at some elevated terrain, early WIPs at this stage but you can imagine how they will look. A windmill and two drilling rigs on the way.


And some barricades/rubble Ive thrown together for the shanty town.


måndag 4 maj 2015

Welcome to the jungle!

 So, every table need some vegetation, be it just a few trees or a whole table coved by dense jungle.  I wanted to create some colorful terrain pieces for the shanty town, so that I cold represent an of world settlement as well as a more near future sci fi like District 9.

Best way to add some color to the terrain is plast plants, got two flowers from the local "cheap junk store" for about €1. And a branch of some kind of plastic bush from Hornbach costing about €5.


Take each layer from the flower and glue it to a small metal disc. Once dry cut of the end, and apply preferred basing materials to the disc.

About the same process with the rest of the vegetation.

Mix it up on the table and you have a nice piece out colorful jungle terrain to explore.

söndag 3 maj 2015

Water Silos

Found a bit tube that just begged to be used for terrain, so here's two water silos for the shanty town inhabitants.


fredag 1 maj 2015

Space station

 Never painted MDF terrain before, so was a bit unsure on how to proceed. But my Googlefu skills pointed me in the right direction I hope. Anyway, I got rather pleased with the end result at least. Started of by giving the terrain a base coat of watered down PVA to stop the MDF from soaking up too much paint. Two coats of blue, varnish and done!

The fact that I spent my youth playing Warhammer 40.000 2nd Ed might have something to do with the choice of color here. Blue seemed like the most logical color for an old space port.


onsdag 29 april 2015

MadMechaGuy

Bought some laser cut Mdf terrain from MadMechaGuy(http://www.madmechaguy.co.uk). His stuff is really cheap and looks ace considering the low price you pay for it! Got some shelters, helipads, containers, billboards, and a few different houses to try out for my city table later on. Needless to say I can really recommend him if you are in need of 15 och 28mm terrain.


tisdag 28 april 2015

I saw the sign!

Well, couldn't resist. Shame on me. Anyway, finished some signs as well as some more barricades to fill up the table and make it more believable that someone actually lives there. Or at least used to...


Printed some nice District 9 posters I found online, these will fit really good as I guess Ill mostly be fighting my friends Crustys on the table. Fry some prawns!


Corn corn corn corn...

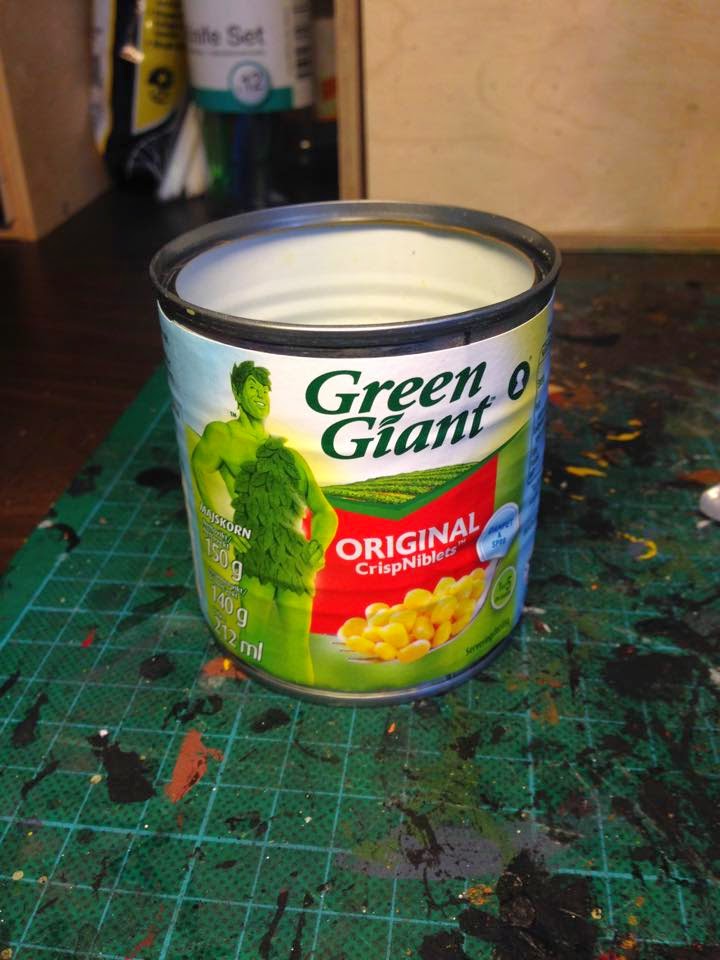
No gaming table would be complete without some silos to hade behind, be it either Warhammer 40.000 och 15mm sci fi. I had been eyeing those cans of corn for some time, a taco dinner later and 
they were finally mine...


Made sure to pin the tubes between the cans so they won't brake of later on. And gave them each a base of plastic card.

Prefer the colorful "cartoony" look on both terrain and models, so these will be a great addition to the table.

For some finishing touches Ive added signs/posters. Just in case anyone thought it might be safe to stay parked behind them for too long...

lördag 25 april 2015

Shanty Town progress

Finished most of the buildings I had done for the Shanty Town and thought Id share the process. Kept a fairly small palette and went for a heavy on rusty/worn look on these as well.


Usually start of with a red brown for the base layer. The most worn brush possible is perfekt here, try to staple the paint.


Add some orange on top, but be careful not get too much. Again a dead brush is your best friend here.

Finish it up with a heavy dry brush of silver, old faithfull Boltgun Metal in my case.

I prefer to add some more detailing once the painting is done. Foliage for bushes, turfs and stones to hold the roof in place are perfect for this.